Guide to Installing WordPress on a Web Host for Beginners
While steps may vary by web host, the video below uses Hostgator as an example. Our site (WpTutorr.com) is hosted on Dreamhost. Dreamhost, Bluehost and Siteground are recommended by the WordPress Foundation, however most web hosts support WordPress installation, giving you flexibility in your choice.
- Many web hosts are US-based and bill in USD, but they typically have global servers to serve your customers locally.
- Hostgator does not provide free privacy (billed at $15 if you want it), whereas Dreamhost includes it for free. For information on choosing a web host click here.
For detailed instructions on installing WordPress, watch the video below or skip to the step by step guide.
Step 1: Choose a Web Host
-
- Research and Select a Web Host: Look for hosts that offer easy WordPress installation, good customer support, and reliable uptime. Popular choices and recommended by WordPress include Bluehost, SiteGround, and DreamHost. (WpTutorr uses Dreamhost)
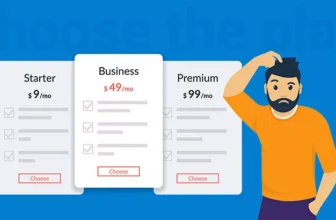
- Sign Up for a Hosting Plan: Choose a plan that suits your needs and budget. Most hosts offer a range of plans from basic shared hosting to advanced VPS options (WpTutorr uses 1GB VPS). They will offer a discount to entice you in. Make sure you know the cost for the next billing cycle and can reasonably afford it. To understand the difference between the plans click here.
Step 2: Register a Domain Name
-
- Choose a Domain Name: Pick a name that represents your website. It should be easy to remember and relevant to your content.
-
- Register the Domain: Many web hosts offer a free domain with their hosting plans. Alternatively, you can register a domain separately through registrars like Namecheap or GoDaddy.
Step 3: Set Up Your Hosting Account
-
- Access Your Hosting Account: After purchasing your hosting plan, log in to your account dashboard.
-
- Locate the WordPress Installer: Most web hosts provide a one-click WordPress installer in the control panel (often cPanel or a custom dashboard).
Step 4: Installing WordPress
-
- Start the Installation: In the control panel, find and click on the WordPress installer icon.
-
- Fill in Installation Details:
-
- Domain: Choose the domain where you want to install WordPress.
-
- Directory: Leave this blank if you want WordPress to be installed in the root directory (e.g.,
www.yoursite.com). If you want it in a subfolder, specify the folder name (e.g.,www.yoursite.com/blog).
- Directory: Leave this blank if you want WordPress to be installed in the root directory (e.g.,
-
- Admin Username and Password: Create a username and strong password for your WordPress admin account. (if using Dreamhost you will not select a password, instead you will be sent a link to your email address after WordPress installation, to choose a password- You will have to click this link to get initial access to you site)
-
- Admin Email: Provide an email address for admin notifications.
-
- Fill in Installation Details:
-
- Complete the Installation: Click the install button and wait for the process to finish. You will receive a confirmation message once WordPress is successfully installed.
Step 5: Configure Your WordPress Site
-
- Log In to WordPress Admin: Go to
www.yoursite.com/wp-adminand log in with the admin username and password you created.
- Log In to WordPress Admin: Go to
-
- Set Up Your Site:
-
- General Settings: Go to
Settings > Generalto configure your site title, tagline, and other basic settings.
- General Settings: Go to
-
- Permalinks: Go to
Settings > Permalinksto choose a URL structure for your posts. The “Post name” option is recommended for SEO.
- Permalinks: Go to
-
- Set Up Your Site:
Step 6: Choose and Install a Theme
-
- Go to Appearance > Themes: Browse the free themes available in the WordPress theme repository.
-
- Install and Activate a Theme: Click on the theme you like, then click “Install” and “Activate.”
Step 7: Install Essential Plugins
-
- Go to Plugins > Add New: Browse or search for plugins that add functionality to your site.
-
- Install and Activate Plugins: Popular plugins include Yoast SEO, Akismet Anti-Spam, and Contact Form 7.
Step 8: Create Content
-
- Add Pages: Go to
Pages > Add Newto create static pages like “About” and “Contact.”
- Add Pages: Go to
-
- Add Posts: Go to
Posts > Add Newto start blogging.
- Add Posts: Go to
Step 9: Customize Your Site
-
- Customize Appearance: Go to
Appearance > Customizeto tweak your site’s look and feel.
- Customize Appearance: Go to
-
- Set Up Menus: Go to
Appearance > Menusto create and manage your navigation menus.
- Set Up Menus: Go to
Step 10: Launch Your Site
-
- Review Your Site: Double-check all settings, content, and functionality.
-
- Publish: Once satisfied, your site is ready for visitors. Share your domain with the world and start promoting your content.
Congratulations, your WordPress site is now live! Continue to update and improve your site as you grow.
SaveSavedRemoved 0
Related Articles


